INSTALLATION INSTRUCTIONS
FIRST CHOICE LUXURY VINYL PLANK INSTALLATION INSTRUCTIONS
-
|
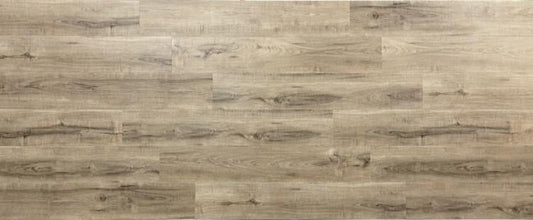
Constructed with exclusive patented Unclick locking system that allows the seamless, tight, durable and waterproof.
|
| Is easy to install as all floating without using glue. |
|
So easy to install that you need is a smooth dry surface and a few tools.
|
|
Once completed the installation, it can receive traffic immediately.
|
-
Recommended Use
| Residential and commercial use. |
| On top of stairs. |
| Do not install over ramps. |
-
Storage
| Lay cartons neatly. |
| Stack on flat smooth surfaces. |
|
Do not stack over ten cartons high, for an extended amount of time.
|
|
Avoid violent collisions, will damage the product, which is not covered under warranty.
|
-
Acclimation & Preparation
|
First Choice vinyl planks must be acclimated at a constant temperature between (65 F and 85F) FOR 48 HOURS prior to and throughout the installation.
|
|
During the installation, mix and install planks from different boxes.
|
|
Always allow a 1/4 expansion space around the entire room, and at all fixtures, and pipes, failure to allow the 1/4 expansion will void all warranties.
|
|
Covered the exposed edges with trim, fill all gaps with a high clear silicone caulking.
|
| Remove wall and doorway trim. |
| Undercut door casings. |
| Clean the sub-floor. |
-
Tools Required
| Utility knife. |
| Square. |
| Chalk line. |
| Tape measure. |
-
Sub-floor Recommendations
|
First Choice Vinyl Planks can be installed over a variety of sub-floor, surfaces include concrete, wood and many existing hard sub-floors.
|
| The sub-floor must be smooth, flat, solid and dry. |
|
Sub-floors should be flat within a tolerance of 1/8 inch must be sanded down or filled with a floor leveler.
|
|
Vinyl planks are resistant to water damage, but they do not prevent the transmission of moisture.
|
|
Care should be taken to keep moisture from collecting on either side of the flooring.
|
-
Concrete Sub-floors
|
Vinyl Plank flooring can be installed over concrete on all grade levels, if a proper moisture is used.
|
|
Lightweight concrete: Internal humidity test should performed per installation.
|
|
Fill Cracks, saw cuts, control joints, and level uneven areas that exceed 1/16 in 3
|
|
Do not install flooring over expansion joints, or over ceramic, tile flooring.
|
-
Wood Flooring Sub-floors
|
Vinyl Plank Flooring are suitable for installation over double layer wood subfloor that are a minimum of 1 inch thick, or single layer subfloor.
|
|
Wooden subfloor installed over a crawl space should have a moisture barrier installed in it with at least 18 inches of ground clearance.
|
-
Plywood Subfloors
First Choice must be installed over First Choice underlayment
-
ATTENTION:
|
Installation over oriented strand board and particle board is not recommended since these panels’ presents a greater risk of sub floors instability and can detract from the performance of the floor.
|
|
Avoid subfloor that has excessive vertical movement or deflection.
|
|
Indications of excessive deflections are subfloor fastener release, squeaking, comprised or sectional contours such as bowing or dipping in floors and uneven flooring material.
|
|
Nail or screw subfloor panels to secure boards with excessive movement, or deflection prior to installation,
|
|
Our warranties DO NOT cover any problems caused by inadequate substrates or improper installation
|
-
Existing Sub-floors:
|
First Choice Vinyl Plank Flooring can be installed over a variety of finished floors.
|
| The surface must be in good condition-, dry smooth flat. |
| Level deep or wide grout lines with embossing leveler. |
|
Do not install flooring over heavy cushioned floors, or over tile installed over concrete below grade level.
|
|
The grout joints in ceramic tile and marble must be level so they are flush with the tile surface.
|
-
Installation Plank Layout
|
Do not secure planks to the sub-floor as it is designed to be a free floating floor.
|
|
All door jams should be undercut and cabinets cannot be installed on top of the vinyl flooring.
|
|
Wall moldings and transition strips should be installed any exposed plank edges, but should not fastened through the planks.
|
-
| Step 1: | Determine how you want the floor to run. |
|
Typically for plank products, the flooring runs the length of the room.
|
|
| There may be exceptions since it is all a matter of preference. | |
| Step 2: |
To avoid narrow plank widths or short board lengths near the windows/walls, it is important to do some pre-planning,
|
|
Using the width of the room, calculate how many full boards will fit into the area and how much space remains that will need to be covered by partial planks. Divide the remaining space by two to calculate the width of the partial planks.
|
|
| Step 3: |
Note if the first row of planks does not need to be trimmed in width.
|
|
It will be necessary to cut off the unsupported tongue so that a clean, solid edge is toward the wall.
|
|
| Step 4: |
1/4 inch expansion gaps should be kept from the wall during the installation.
|
|
This will allow space the natural expansion and contraction of the planks.
|
|
| Step 5: | The planks should be installed from left to right. |
|
From the top corner of the room, put the first plank in place so that both the head and side seam grooves are exposed.
|
|
| Step 6: |
Install the second plank in the first row by angling the short side tongue into the short side grove of the first plank.
|
|
Continue installing additional planks along the row using the same angling method.
|
|
| Step 7: | To start the second row, using 1/3 a plank. |
| Place the end cut next to the wall. | |
|
Insert the tongue on the long side of the plank into the groove of the plank in the first row.
|
|
|
Hold the plank in 20 degree angle while applying pressure inward and downward until they lock together.
|
|
| Step 8: |
Install the 2nd row by inserting the short side tongue into the previously installed 1st plank short side groove.
|
|
To complete the second and all successive rows, it will be necessary to lock the short end into the previous plant first before locking the long side of the plank.
|
|
|
Angle the plank and push the tongue into the groove and just it until the tongue locks into place.
|
|
|
It may be necessary to lift both planks slightly to lock the joint together.
|
|
| Step 9: |
Align the plank so the long side tongue tip is positioned just over the groove lip of the plank in the first row.
|
| Step 10: |
Using gentle force and 20 - 30 angle, push the long side tongue into the groove of the adjoining plank by sliding along the short side seam.
|
| Step 11: |
The remaining planks can be installed in the room using the same technique.
|
|
Make sure the required expansion gaps are maintained against all fixed vertical parts (such as walls, doors, cabinets etc.).
|